Turbine Project
(4/28/2014 - 5/16/2014)
Introduction: Before I behold you with a plenty of pictures, I'd like to say that the Wind Turbine project was one of the most fun projects that we did all year. My favorite part of technology is electrical because it just amazes me how a little thing such as a battery can power such an object as a phone. If there was no electricity the world would not go round. To give my personal review of this project, I'd give it an A+ from an electrical mans view. The goal of this project was to create a wind turbine and have the highest voltage reading in the class, the following explains my process and journey of the Wind Turbine.
Part One: Choose Your Partners and Choose Them Wisely! (4/28/2014)
I went into this project knowing that it was going to be a very long process. Mr. Ramos granted us all the ability to choose our destiny as well as choose the partners that will accompany us on this Wind Turbine adventure. I, of course, first joined with my engineering colleague, Alec Martin, to do this project. Mr. Ramos also granted us the ability to have a maximum of 4 partners. Me and Alec thought long and hard about who we'd choose to go on this journey with us. Eventually we narrowed it down to two candidates, Justin Rodrigues and Noah Julius. Together we formed the Wind Turbine A-Team.
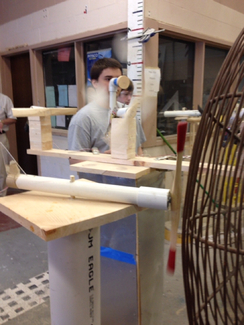
Part Two: Creating a Platform (4/30/2014)
This picture shows our first step in the engineering design process past research. We, as a group, realized we must first create a base or a platform for our turbine to sit on. We did this by measuring at the piece of wood that we found and cut it out to form a nice solid base for our holding cell.
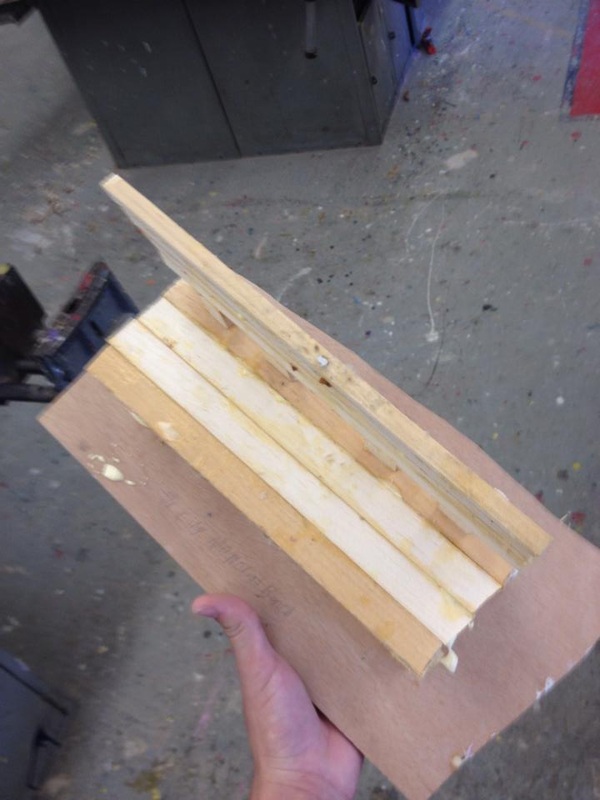
Part Three: Creating a Propeller for Our Wind Turbine (5/1/2014)
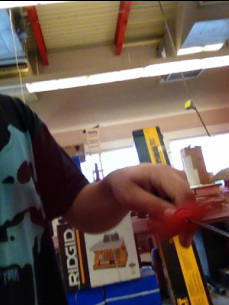
Each member of the group had to form their own propeller. The picture shown is an action shot I took of my parter Justin's propeller. We created this by cutting the wood to the appropriate size of a propeller. As Mr. Ramos always says "we work together we learn together", we learned that we couldn't just cut a piece of wood and label it a "propeller". Mr. Ramos was kind enough to tell us that a slight "swerve" or a curve to the piece of wood would make it work even better! We created these swerves by using the cheese grater, as I like to call it, and formed the twist and turns of a propeller. Eventually we all created propellers for our design and were ready to take the next step.
Part Four & Five: Creating the Base and Pouring the Cement (5/7/2014)
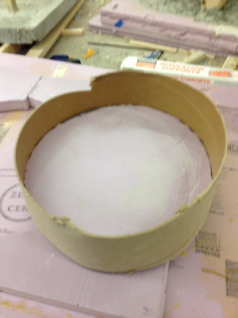
This next step in my groups engineering process was to create a base/holding cell. We accomplished this goal. The paper was made out of some Manila folder-Esque paper and we cut it out in a circle because that's how we were shown. Now that we created this holding cell we were ready to rock n' roll.
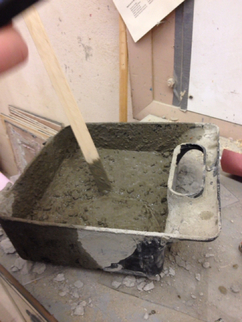
To do this next step, we needed to use our concrete pouring skills from the project we learned in the first term. We then poured the concrete in to the holding cell to create and even stronger base. We then stuck the the tower/big white pipe of the turbine in the center of the holding cell and the concrete.
Part 6: Creating the Base for the Propellers (5/11/2014)
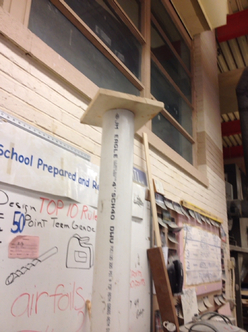
We are now closing in on the end of the turbine project. After waiting about 3/4 days for the concrete to harden and keep the white tower/big pipe standing still, we could then put the wooden base on the top of the big white pipe as shown in the picture which would hang the propellers on top of the pipe. We were then ready to take on the voltage challenge
Part 7: Completion! (5/16/2014)
Our project is seen going through step number 6, I believe, of the engineering process which is testing. Our project, the furthest left, was a pretty huge success for all of our group members. We were now testing and recieved our voltage reading which is displayed in the next picture.
Part 7.5: Voltage Reading (5/16/2014)
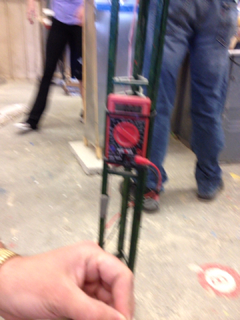
Our voltage reading ended up coming out to about .22 volts. It was not as good as I expected but it's still results. Concluding on this project, I really really enjoyed it. The whole engineering process of it was fun and after working nearly a month on it, it felt accomplishing when watching it be tested. As I stated in the introduction, this project was possibly my favorite all year and it certainly was a blast! On to the next project.
Clamp Project (5/17/2014-6/10/2014)
(5/17/2014 - 6/10/2014)
Introduction: Before I start introducing anything I'd first like to apologize that, I was only able to retain a few pictures from this Project
as my phone was reset and I lost most of my information. I will try my best to use text to explain the project as much as possible. The goal of this project was to create either a clamp or a mouse trap that would actually work.
as my phone was reset and I lost most of my information. I will try my best to use text to explain the project as much as possible. The goal of this project was to create either a clamp or a mouse trap that would actually work.
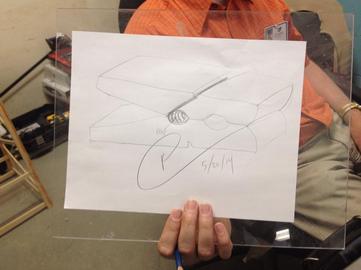
Part One: Creating a Drawing of the Clamp (5/18/2014)
Like most projects in the engineering design room. Step one of the process was to develop a design by drawing for the clamp. I developed this design in a period 2 study and Mr. Ramos absolutely loved the drawing. He checked off my paper and told me to get started with the rest of the project.
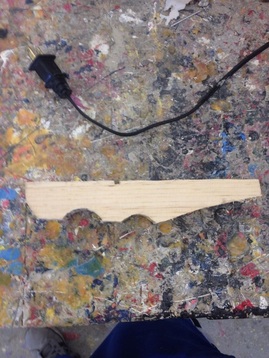
Part Two: Creating the Two Sides of the Clamp (5/20/2014)
I, then, would have to transfer my drawings onto a piece of wood and cut it off with the bandsaw. It was actually pretty tough cutting out the two seperate identical sides of the clamp as there were many twist and turns and curves which is really hard to deal with on the band saw. Eventually though I ended up using the belt sander to get a little part off of the sides and then I was all set with a clamp without the spring.
Part Three: Creating the Spring/Conclusion (5/30/2014)
This was most likely the toughest part of the whole project and I knew it would be going in to it. When I first developed my idea of a clamp, I had realized that I must put a spring in the center and have it stay somehow as well as be snug and actually allow the clamp to work. It took me almost 3 classes to be able to get this spring to work. I had to bend it using clamps and my own pure strengths. There was a little latch at the top of sides of the clamp that would hold the spring in the middle. Eventually I got the spring inside and my project was up and ready to go.
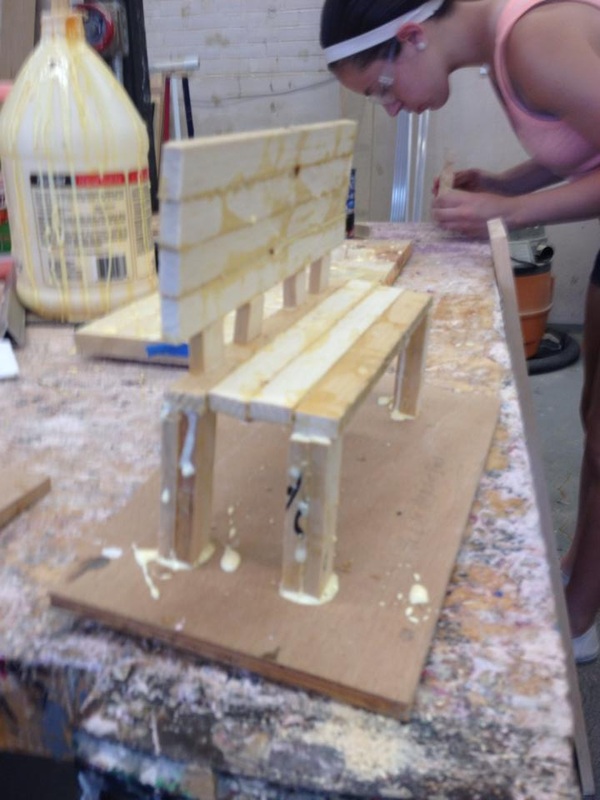
Final Project
(6/18/2014)
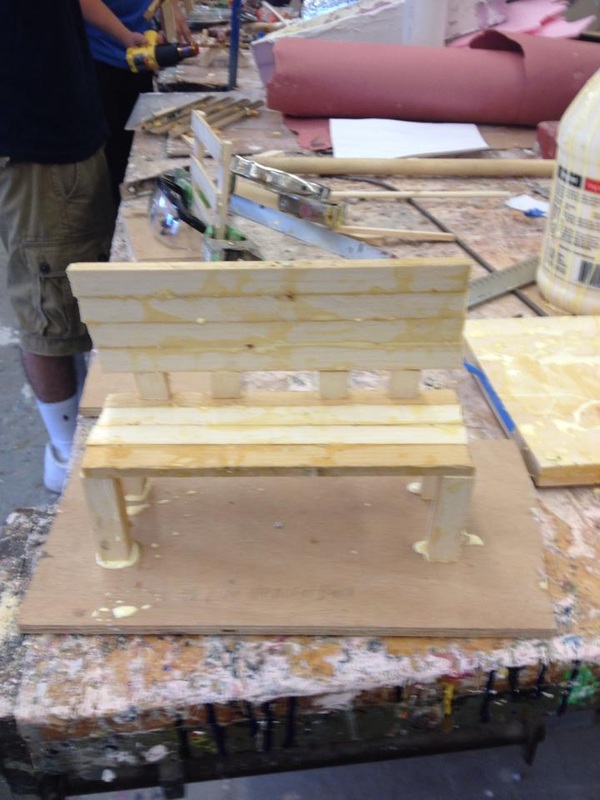
The decision of what the project was going to be was a gametime decision by Mr. Ramos. Going in to the project we were completely unaware as to what would come. It was revealed today during class completely live, that the project would be to create a bench. This was similar to the picnic table we thought it would be, but it was still a challenge. At first I had to hypothesize how I would end up creating this bench. I started off by ripping wood with Noah Julius getting 4 pieces of wood. I then cut 8 9-inch pieces of wood which would be apart of my two sides of the bench. I glued them together forming two sides of the bench. I then cut out 4 1 inch pieces of wood to create a stand for the upright side that a persons back would be leaning on. I glued those on to the sitting side of the bench and then glued the upright side onto the 1 inch pieces. I then cut out 3 1/2 inch pillars to put underneath the bench to elevate it. I glued those pillars to a base I had planned out that was 2 feet wide and 2 feet long. Once everything dried I glued the bench to the pillars and bam my bench was created. I made the bench look rugged because I was going for the theme of it being in the city and benches there usually get trashed. I really enjoy concept art better than regular art so I really enjoyed doing a themed piece. Concluding on my whole engineer year, I had a blast, I truly can say I will miss this class as it was fun seeing an invention evolve and becoming something. I've recommended a lot of other people to take the class as I really really enjoyed it.